Installing a stone bathroom countertop requires careful handling and proper sealing with silicone to ensure longevity and functionality. Heavy lifting is necessary for the stone, and using the right silicone sealant prevents water damage and enhances durability.
Essential Tools for Stone Countertop Installation
Installing a stone bathroom countertop requires careful preparation and the right tools to ensure a successful outcome. From cutting equipment to sealing materials, having the essential tools on hand can make the heavy lifting and installation process smoother. This section outlines the key tools you’ll need for a professional finish.
Before starting the installation, gather all necessary tools and materials. This preparation helps streamline the process and ensures you have everything at hand. Key items include:
-
Stone countertop of your choice
-
Silicone sealant specifically for stone
-
Caulking gun for easy application
-
Level to ensure a flat surface
-
Measuring tape for accurate dimensions
-
Safety gear including gloves and goggles
| Tool/Material | Purpose |
|---|---|
| Stone countertop | Main surface |
| Silicone sealant | Prevents water damage |
| Caulking gun | Applies sealant |
| Level | Ensures flat installation |
| Measuring tape | Ensures accuracy |
| Safety gear | Protects during installation |
Recommended Products
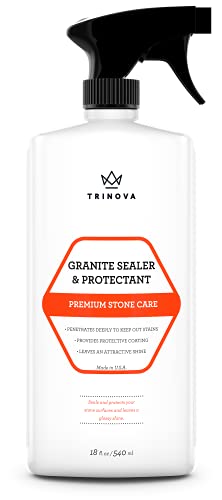
Professional Quality Stone Care – TriNova’s Granite Sealer and Protectant offers a premium sealant and caring solution for your premium stone surfaces, including marble. Whether you’re looking for a sealing product for the first time or a resealer for long-lasting protection, this product can give your granite surfaces the before and after results you want to see. Great for Quartz, Marble, Granite, Quartzite, and Soapstone.

Waterproof sealant: This clear caulk seals out air, water, and moisture with 100% silicone as cured
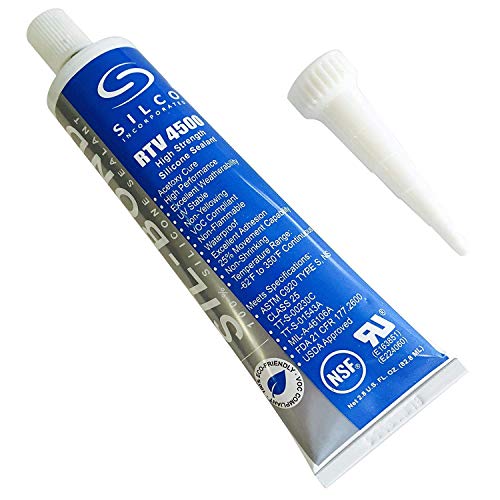
Food Contact Safe 350F high temp
Installation Area Preparation Steps
Preparing the installation area for a stone bathroom countertop is crucial for a successful and durable fit. This process involves careful assessment and cleaning of the existing surface, ensuring all necessary tools and materials are on hand. Proper preparation not only facilitates easier installation but also helps prevent future issues with the countertop.
Preparing the area is crucial for a successful installation. Clear the existing countertop and clean the surface thoroughly.
Ensure the cabinet is level and structurally sound. Any imperfections can lead to uneven surfaces or gaps.
-
Remove the old countertop completely.
-
Clean the surface with a suitable cleaner to remove debris.
-
Check the cabinets for levelness and stability.
Stone Countertop Lifting Techniques
Installing a stone bathroom countertop requires careful handling due to its weight and fragility. Proper lifting techniques are essential to avoid damage and ensure a secure fit. Understanding these methods will help you manage the heavy lifting involved in the installation process effectively.
Lifting a stone countertop requires proper techniques to prevent injury and damage. It’s important to have at least one helper for this task. Follow these steps for safe lifting:
-
Assess the weight of the stone. Ensure it is manageable.
-
Lift with your legs, not your back. Bend at the knees and keep your back straight.
-
Communicate with your helper. Coordinate movements to lift and position the stone together.
Always wear safety gear during lifting to prevent injuries.
Recommended Products

𝗚𝗬𝗠𝗥𝗘𝗔𝗣𝗘𝗥𝗦 𝗟𝗜𝗙𝗧𝗜𝗡𝗚 𝗦𝗧𝗥𝗔𝗣𝗦 - Built for lifters who refuse to let grip fatigue limit performance. These classic cotton lifting straps are designed to lock your hands securely to the bar so you can focus on strength, form, and execution. Whether you’re pulling heavy deadlifts, grinding out rows, or finishing a brutal back day, these straps help you train harder, lift more, and push past grip failure with confidence.

【STRONG AND STURDY】High quality custom made material, with heavy duty stitching, means these figure 8 straps will last.

[ALL LEVELS] Designed for weightlifting, powerlifting, and bodybuilding, these lifting straps help you increase grip strength and eliminate slipping, allowing you to lift heavier and pull stronger without wrist fatigue. Built to withstand high-intensity weight training and long-lasting performance without cutting off circulation, making them an ideal weightlifting accessory for athletes of all levels.
Silicone Sealant Application Techniques
Applying silicone sealant is a crucial step in ensuring a durable and watertight finish for your stone bathroom countertop. Mastering the right techniques can help prevent leaks and enhance the overall appearance of your installation. This section will guide you through effective methods for applying silicone sealant with precision and confidence.
Once the countertop is positioned, applying silicone sealant is essential for a watertight seal. Follow these steps for effective application:
-
Cut the tip of the silicone sealant tube at a 45-degree angle.
-
Load the tube into the caulking gun.
-
Apply a continuous bead of sealant along the edge where the countertop meets the wall and cabinets.
-
Smooth the sealant with a finger or a caulk smoothing tool for a clean finish.
Ensure the sealant is compatible with the stone material to avoid damage.
Recommended Products

【Comfortable Grip】 Lightweight design with a rotating barrel reaches tight corner. Ergonomic grip reduces fatigue during grout removal or caulking projects, creating smooth silicone caulk lines

PRECISION CAULKING WITH DRIP-FREE TECHNOLOGY: The Octogun 930-GTD Caulking Gun by Newborn offers advanced drip-free technology, providing smooth, mess-free caulking every time. With a 10:1 thrust ratio, this caulking gun delivers precise control over caulk flow. Ideal for sealing joints, cracks, and gaps, this caulk gun ensures clean, accurate applications in every use.

【Comfortable Grip】 Lightweight design with a rotating barrel reaches tight corner. Ergonomic grip reduces fatigue during grout removal or caulking projects, creating smooth silicone caulk lines
Maintain Your Stone Countertop
Maintaining your stone bathroom countertop is essential for preserving its beauty and functionality. Regular care not only enhances its appearance but also extends its lifespan, ensuring that your investment remains protected against stains, scratches, and other wear. Understanding the best practices for upkeep will help you keep your countertop looking pristine for years to come.
Proper maintenance extends the life of your stone countertop. Regular cleaning and sealing are necessary to maintain its appearance and functionality. Consider these maintenance tips:
-
Clean with a pH-balanced cleaner to avoid damage.
-
Seal the countertop every 6 to 12 months depending on usage.
-
Avoid placing hot items directly on the stone to prevent thermal shock.
Regular maintenance prevents stains and keeps the countertop looking new.
Troubleshoot Common Installation Issues
Installing a stone bathroom countertop can present various challenges that may arise during the process. Understanding common installation issues can help you navigate potential setbacks effectively, ensuring a smoother experience. This section addresses typical problems and offers practical solutions to keep your project on track.
Even with careful planning, issues may arise during installation. Being prepared to troubleshoot can save time and effort. Common issues include:
-
Uneven surface: Check the level of the cabinets and adjust as needed.
-
Gaps in sealant: Reapply silicone sealant to fill any gaps.
-
Chips or cracks: Use a stone repair kit to fix minor damage.
Addressing these issues promptly ensures a successful installation.
Complete Countertop Installation Steps
Installing a stone bathroom countertop involves careful planning and execution to ensure a successful outcome. This section outlines the complete steps necessary for proper installation, including the heavy lifting required to position the countertop and the crucial application of silicone sealant for a watertight finish. Follow these guidelines to achieve a professional-looking result in your bathroom renovation.
Once everything is in place and sealed, finalize the installation by cleaning the area and allowing the silicone to cure. Follow the manufacturer’s instructions regarding curing time for the best results.
-
Clean the countertop surface to remove any excess sealant.
-
Avoid using the countertop for at least 24 hours to let the sealant cure properly.
This careful approach ensures a durable and aesthetically pleasing stone bathroom countertop installation.