Filling screw holes in bathroom tile requires a precise approach to ensure a seamless finish. Using epoxy for color matching is essential for achieving a professional look that blends with your existing tiles. This guide will help you select the right materials and techniques for effective repair.
Gear and Supply Checklist for Epoxy Repair
Before starting your epoxy repair project on bathroom tile, it’s essential to gather the right tools and materials. This checklist will ensure you have everything needed for effective color matching and a seamless finish. Proper preparation is key to achieving a professional-looking result in your tile repair efforts.
Before starting the project, gather all necessary tools and materials. Having everything on hand will streamline the process and prevent interruptions. The following checklist includes essential items for filling screw holes in bathroom tile.
| Item | Purpose |
|---|---|
| Epoxy adhesive | Fills holes and bonds to tile |
| Color matching kit | Ensures correct color blend with tiles |
| Putty knife | Applies epoxy smoothly |
| Sponge | Cleans excess epoxy |
| Masking tape | Protects surrounding areas |
| Sandpaper | Smooths the surface after curing |
Recommended Products
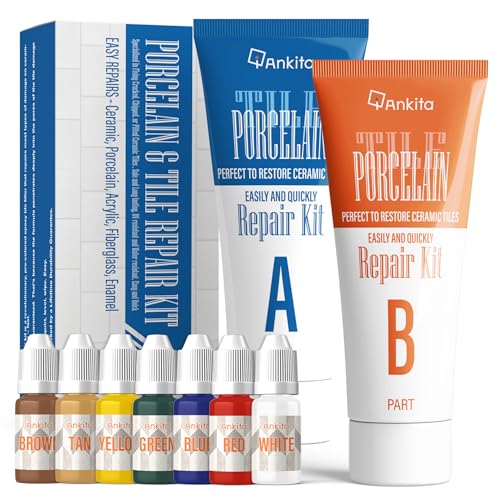
Matches Any Color Tiles: Reduce painful color annoyances; our accompanying manual will walk you through every step of DIY restoration; ideal for beginners; match white, off white, beige, tan, almond, gray, brown, orange, red, green, blue, black, etc

Versatile Porcelain Repair Kit - It’s not only great for porcelain tile repair, also use it for granite countertops repair, Quartz Countertops repair, ceramic sink repair, marble repair, acrylic bathtub repair, fiberglass shower, porcelain dinnerware, travertine, limestone, slate, sandstone etc.

Powerful repair, restoration as good as new: This fiberglass repair kit uses a high-quality epoxy resin formula with excellent adhesion and wear resistance. Whether it is cracks, scratches or small holes, this porcelain repair kit can cover them firmly to form a high-gloss and smooth repair layer. The waterproof and impermeable properties of the fiberglass tub repair kit make it still perform well in a humid environment, and the repair effect is long-lasting and durable
Surface Cleaning and Safety Precautions
Proper preparation is crucial for a successful repair. Start by cleaning the area around the screw holes. Remove any debris or dust to ensure a strong bond. Wear safety goggles and gloves to protect yourself from epoxy fumes and skin contact.
-
Clean the surface with a damp cloth.
-
Apply masking tape around the holes to protect the tile.
-
Ventilate the area to minimize exposure to fumes.
Ensure the area is dry before applying epoxy.
Expert Techniques for Filling Tile Screw Holes
Filling screw holes in bathroom tile requires precision and the right techniques to ensure a seamless finish. This section provides expert insights into selecting the appropriate materials and methods for achieving effective color matching with epoxy, ensuring that repairs blend seamlessly with your existing tile. Learn how to tackle this task with confidence and skill.
Filling screw holes in bathroom tile involves a few straightforward steps. Follow this method to achieve a clean and professional finish.
-
Select the appropriate epoxy from your color matching kit.
-
Mix the epoxy according to the manufacturer’s instructions.
-
Use a putty knife to apply the mixed epoxy into the screw holes.
-
Smooth the surface with the knife to ensure it is level with the tile.
-
Allow the epoxy to cure as per the product guidelines.
| Step | Action |
|---|---|
| Step 1 | Select epoxy color |
| Step 2 | Mix epoxy thoroughly |
| Step 3 | Apply with putty knife |
| Step 4 | Smooth and level |
| Step 5 | Cure as directed |
Recommended Products

**6-Color Custom Match & 5.6oz Total Capacity** – Our tub & tile repair kit includes 2 tubes (2.8oz each) of repair compound + 6 color pigments for a perfect **color match** on porcelain, fiberglass bathtubs, marble countertops, granite, acrylic, and more.

Waterproof and very firm after curing, Fiberglass Repair Kit can be used to repair chips, scratches, dents, patch, worn, holes ect . Apply to fiberglass bathtub, acrylic bathtub, ceramic bathtub, enamel bathtub, cast iron bathtub, porcelain sink, ceramic tile, toilet, and cultured marble.

【Acrylic Formula】Our tub paint boasts an advanced water-based acrylic formula designed for durability and longevity. The high-quality acrylic resin ensures a strong, resistant finish that combats flaking and wear, providing a lasting transformation for your tiles
Epoxy Color Matching Methods for Tile Repairs
When repairing bathroom tile, achieving the right color match for epoxy is crucial for a seamless finish. Various methods can help you identify and replicate the tile’s color, ensuring that your repairs blend in effectively. This section outlines practical techniques to help you select the perfect epoxy shade for your tile repairs.
Achieving the right color match is vital for a seamless repair. Use the following techniques to ensure the epoxy blends well with your tile.
-
Identify the tile color using a color matching kit.
-
Mix small batches of epoxy to test the color before full application.
-
Adjust the color by adding small amounts of pigment until the desired shade is reached.
Test the color in a discreet area to confirm the match.
Recommended Products

Complete Repair Solution: Professional grade granite epoxy repair kit; Fixes chips, cracks and damage in stone surfaces; Restores countertops to like-new condition; Works on marble repair kit applications; Includes coloring kit for proper blending

Ultra-Bond Ceramic & Porcelain Tile Repair: Quickly and easily fix chips, cracks, holes, and scratches on all tile surfaces—ceramic, porcelain, acrylic & natural stone; Restores unsightly damage on bathroom and kitchen floors or walls to a brand-new, seamless finish in minutes
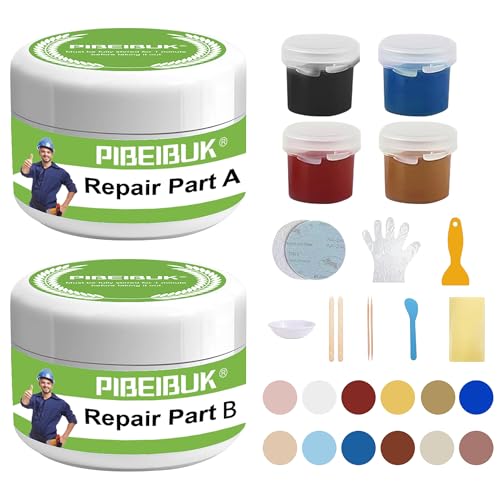
Versatile Use: Repair a wide range of surfaces including bathtubs (acrylic, fiberglass), sinks, tiles, countertops (granite, marble, quartz, epoxy), porcelain fixtures, ceramic, and stone. The PIBEIBUK kit handles common household surface damage.
Post-Curing Epoxy Finishing Techniques
After applying epoxy to fill screw holes in bathroom tile, proper finishing techniques are essential for achieving a seamless look. This section will explore effective post-curing methods to enhance the appearance of your repairs, ensuring that the filled areas blend harmoniously with the surrounding tile. Mastering these techniques will elevate the overall aesthetic of your bathroom.
Once the epoxy has cured, it’s important to finish the job properly. This will enhance the appearance of your repair and maintain the integrity of the tile.
-
Lightly sand the cured epoxy to ensure it is flush with the tile surface.
-
Wipe the area with a damp sponge to remove any dust.
-
Remove masking tape carefully to avoid pulling up the cured epoxy.
Do not rush the sanding process to avoid damaging the tile surface.
Filling Process Issue Resolution
When filling screw holes in bathroom tile, challenges can arise that may complicate the process. Understanding common issues and their resolutions is essential for achieving a seamless finish. This section addresses potential problems you might encounter and offers practical solutions to ensure a successful repair.
Sometimes issues may arise during the filling process. Knowing how to address these can save time and effort.
-
Epoxy does not adhere: Ensure the surface was properly cleaned and dried.
-
Color mismatch: Reassess the color mixing process and adjust as needed.
-
Uneven surface: Sand down high spots and reapply epoxy if necessary.
By following these guidelines, you can effectively fill screw holes in bathroom tile using epoxy. This method not only improves the aesthetic of your tiles but also protects them from moisture damage.